AirPiConsole part two
Overview
Welcome back to AirPiConsole blog post, this is part two.
If you read part one and followed the configuration steps you should now have a fully working Raspberry Pi Zero W connected to your WiFi network.
You should also be able to connect via Bluetooth to get a console connection without knowing the IP address of the Raspi.
Now it's time to move on and start to actually connect to the serial ports.
USB to serial
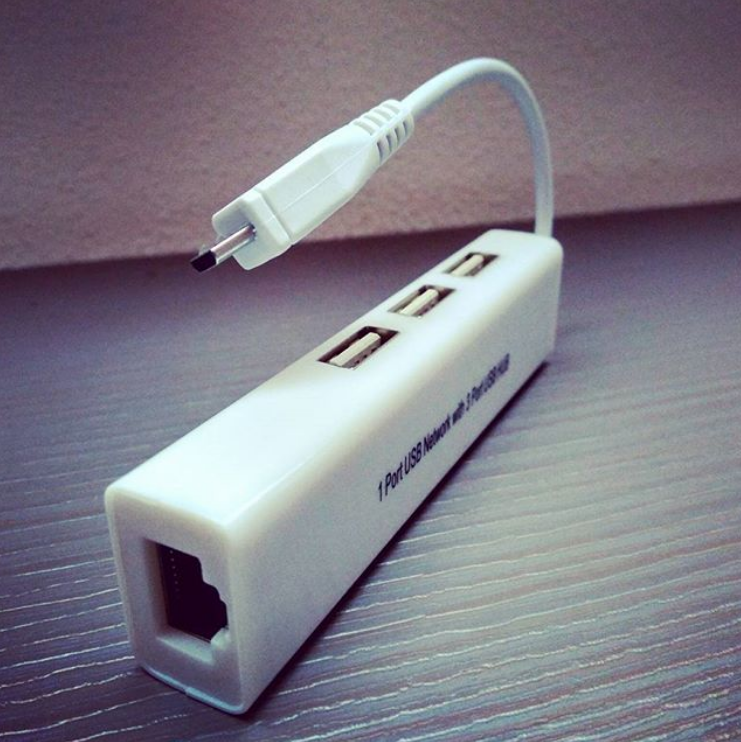
To connect to devices via serial I use the common USBtoSerial adapters. The Raspi0W has only one micro-USB port so I added a mUSB to Ethernet adapter that is also a 3 ports USB 2.0 hub.
We can see the two USBtoSerial adapters listed in /dev:
pi@piconsole:~$ ls -l /dev/ttyUSB*
crw-rw---- 1 root dialout 188, 0 Sep  1 16:51 /dev/ttyUSB0
crw-rw---- 1 root dialout 188, 1 Sep  1 16:51 /dev/ttyUSB1
To open the serial console install screen:
pi@piconsole:~$ sudo apt-get -y install screen
Now open a screen session on the first serial port:
pi@piconsole:~$ screen /dev/ttyUSB0 9600,cs8
I personally prefer tmux over screen but tmux doesn't support connections to serial ports. Refer to one of the many screen cheat sheets for details.
You can use also minicom or stty. My advice is to try and chose the tool you prefer.
Telnet to USB to Serial
To start a serial connection via console access to Raspi may be tedious sometimes. We have another option that allows us to telnet to the box and get a direct serial connection via the USBtoSerial adapter. Please welcome ser2net.
Installation is simple:
pi@piconsole:~$ sudo apt-get -y install ser2net
Now edit the configuration file with yout favorite text editor:
pi@piconsole:~$ sudo nano /etc/ser2net.conf
and add these lines:
2000:telnet:600:/dev/ttyUSB0:9600 8DATABITS NONE 1STOPBIT banner
2001:telnet:600:/dev/ttyUSB1:9600 8DATABITS NONE 1STOPBIT banner
2002:telnet:600:/dev/ttyUSB2:9600 8DATABITS NONE 1STOPBIT banner
What we do here is to map a tcp port on the Raspberry Pi to it's own serial interface. If you plan to use more than three adapters add more lines increasing port number and device id.
It is also possible to map different tcp ports to the same serial port with different speeds.
Now to connect to the serial port we just have to telnet to the IP address of the RaspberryPi, port 2000 for the first serial and so on.
That's not the most secure method but still useful when we're connected through a safe media. Connection through ssh is preferable when security is a concern.
AutoSSH and reverse tunnel a.k.a. let's go to the cloud!
Airconsole has this awesome Enterprise Server feature that allows to connect to the remote devices from a central console.
I'd really like to replicate a similar feature somehow.
My tools are:
- ssh reverse tunnel
- autossh
- a VPS hosted at cloudatcost
Install autossh:
pi@piconsole:~# sudo apt-get -y install autossh
Generate the public and private key pair that will be used for the remote tunnel:
pi@piconsole:~$ ssh-keygen
Generating public/private rsa key pair.
Enter file in which to save the key (/home/pi/.ssh/id_rsa):
Created directory '/home/pi/.ssh'.
Enter passphrase (empty for no passphrase):
Enter same passphrase again:
Your identification has been saved in /home/pi/.ssh/id_rsa.
Your public key has been saved in /home/pi/.ssh/id_rsa.pub.
The key fingerprint is:
SHA256:Zq91ZPqyLNCL329PyZjby2jsHCxjO7yilTWYliqFjVc pi@piconsole
The key's randomart image is:
+---[RSA 2048]----+
|                 |
|                 |
|        E        |
|     + . +       |
|    o +.S o o    |
|     o.=.+ * + . |
|    . .oooB.* +  |
|     ...+*+B+B   |
|      .ooo*XB.=. |
+----[SHA256]-----+
Add user pi on remote vps. Password doesn't need to match on both systems:
root@vps:~# adduser pi
Adding user `pi' ...
Adding new group `pi' (1000) ...
Adding new user `pi' (1000) with group `pi' ...
Creating home directory `/home/pi' ...
Copying files from `/etc/skel' ...
Enter new UNIX password:
Retype new UNIX password:
passwd: password updated successfully
Changing the user information for pi
Enter the new value, or press ENTER for the default
    	Full Name []:
    	Room Number []:
    	Work Phone []:
    	Home Phone []:
    	Other []:
Is the information correct? [Y/n]
Copy the public key created on Raspberry to remote vps:
pi@piconsole:~$ ssh-copy-id pi@vps
/usr/bin/ssh-copy-id: INFO: Source of key(s) to be installed: "/home/pi/.ssh/id_rsa.pub"
The authenticity of host 'vps (64.137.187.86)' can't be established.
ECDSA key fingerprint is SHA256:pROnO2r6fXWIBWUtVbZRq/K0rz0r8C/pm53Nta9rqc4.
Are you sure you want to continue connecting (yes/no)? yes
/usr/bin/ssh-copy-id: INFO: attempting to log in with the new key(s), to filter out any that are already installed
/usr/bin/ssh-copy-id: INFO: 1 key(s) remain to be installed -- if you are prompted now it is to install the new keys
pi@vps's password:

Number of key(s) added: 1

Now try logging into the machine, with:   "ssh 'pi@vps'"
and check to make sure that only the key(s) you wanted were added.
We should now be able to connect to the remote vps server via ssh without the need of credentials:
pi@piconsole:~$ ssh pi@vps
Linux vps 3.16.0-4-amd64 #1 SMP Debian 3.16.7-ckt9-3~deb8u1 (2015-04-24) x86_64

The programs included with the Debian GNU/Linux system are free software;
the exact distribution terms for each program are described in the
individual files in /usr/share/doc/*/copyright.

Debian GNU/Linux comes with ABSOLUTELY NO WARRANTY, to the extent
permitted by applicable law.
pi@localhost:~$
Disclaimer: this is not best practice or secure. Design a proper security policy and check before using in production.
Now we can start the reverse tunnel from Raspberry to vps:
pi@piconsole:~$ ssh -R vps:2000:127.0.0.1:2000 user@vps
Explanation:
-R makes the tunnel reversed
vps is the public ip address of the cloudatcost server (I put it in /etc/hosts)
2000 (first on left) is the port the vps server listens to
2000 (on the right) is the port on Raspberry, that matches the ser2net port
To verify connect to remote vps server and start a telnet connection to local port 2000:
root@vps:~# telnet 127.0.0.1 2000
Trying 127.0.0.1...
Connected to 127.0.0.1.
Escape character is '^]'.

ser2net port 2000 device /dev/ttyUSB0 [9600 N81] on piconsole
The ser2net banner confirms we are connected. We have now a secure "cloud" access to the remote serial port.
Autossh start on boot
To allow autossh to start on boot download this file from my Github repository
https://github.com/routetonull/piconsole/blob/master/autossh
Copy to
/etc/init.d
Add execution permissions
chmod +x /etc/init.d/autossh
Set auto start
update-rc.d autossh defaults
Reload systemd manager configuration (necessary every time the file is changed)
systemctl daemon-reload
I've added three copies of the same file, named
autossh2000
autossh2001
autossh2002
one for each port of my USB hub, just in case I need three simultaneous connections. Feel free to add more, I think the limit is just the power available on Pi. I read about people connecting up to 16 USBtoSerial adapters using powered USB hubs.
Now reboot the Raspberry, connect to vps and telnet on local ports to verify the serial connection works.
Our SAAS (serial as a service) cloud infrastructure is ready!
Planned improvements
Port 22 is often closed outbound on the firewalls. Tunneling outbound SSH traffic for tunnels through port 443 may improve the chances of an established connection.
Another useful feature would be to use the Pi as access-point instead of WiFi client.
Sometimes terminal have a small size, it is possible to customize the values for better results.
The future
I can quite easily imagine how this small project could scale to hundreds or remote devices that connect to a central server for management. It would need an automated on-boarding procedure and a way to manage all the remote devices but Salt/Puppet/Chef would help for this.
Hardware reliability would maybe be an issue, Raspberry Pi is great for prototypes but they don't look able to manage a 24/7 load.
Known issues
I still haven't figured out how to send CTRL+C when connected to Raspi via Bluetooth to interrupt a running command. As a workaround I start a tmux sessions right after connecting.
UPDATES
Nov '17: added LLDPD developed by Vincent Bernat
Wrap up
The common dilemma is buy or build?
The answer often depends on what's the more scarce resource you have, money or time.
For this project I chose to build to have more flexibility and margin for improvement }without relaying on a vendor to implement what I'll need. It would have been easier to simply buy another Airconsole but I wouldn't have learned so many new Linux tools and commands. It is all about the journey.
I hope you enjoyed this two parts blog post and will get rid soon of long console cables and go wireless and cloud instead ;-)
Feel free to contact me on Twitter or in the comments below to improve the project.
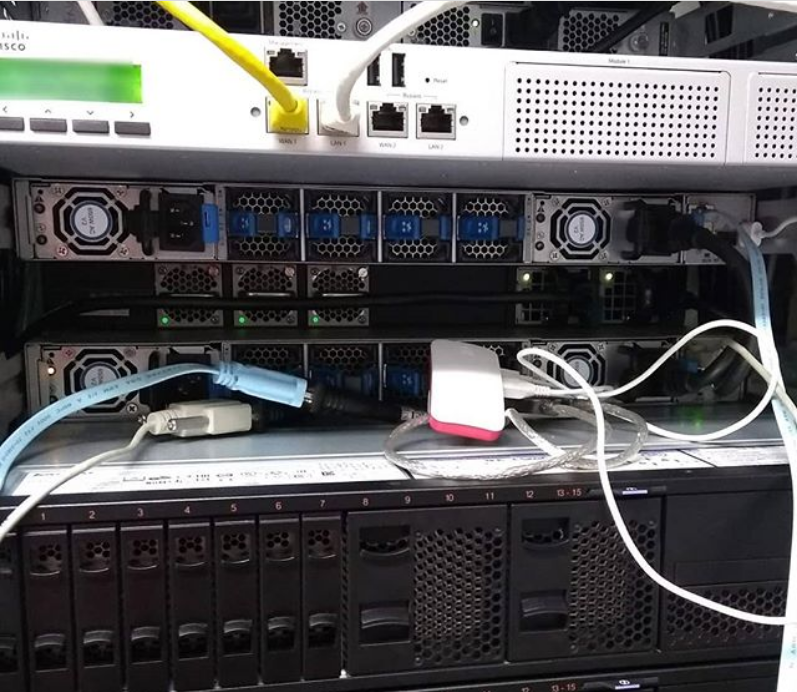
The final result on my desk:
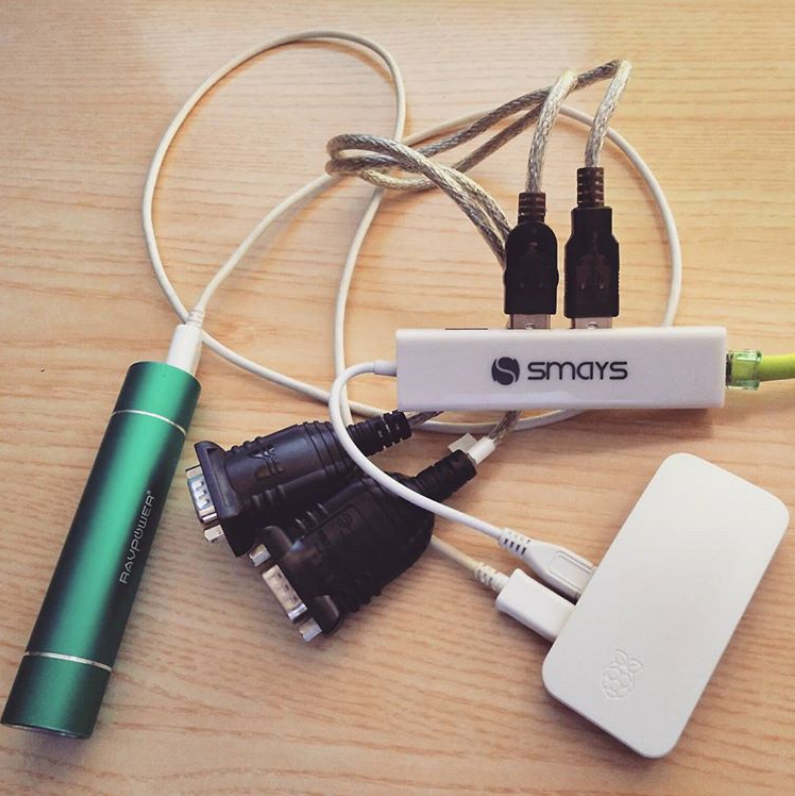
Battery pack providing power to AirPiConsole
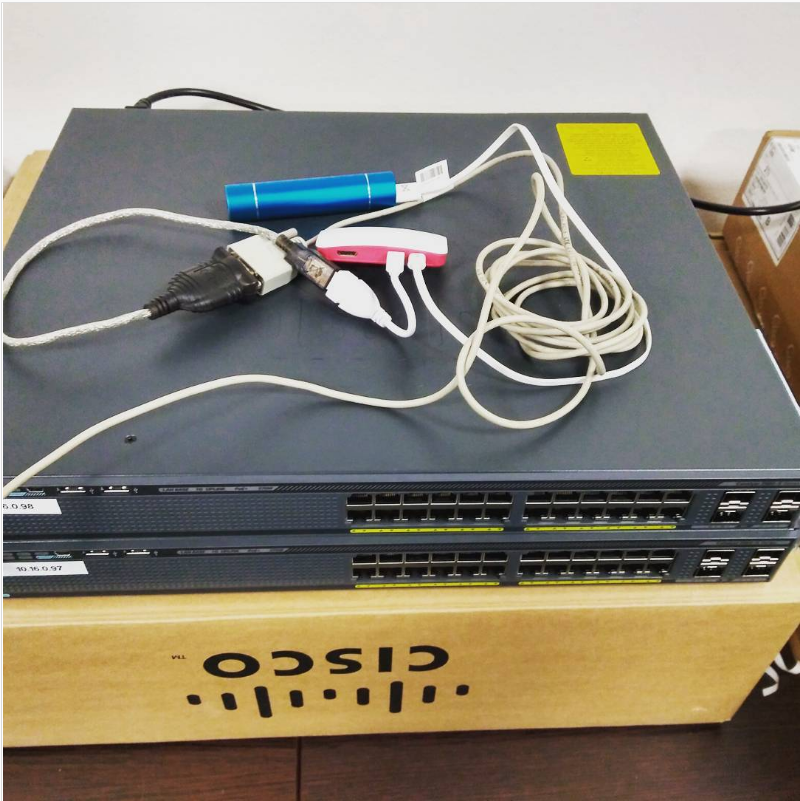
AirPiConsole in action providing console accesso to a pair of Nexus 9k
What's next
In the next episode of this series we'll provide an overlay remote access to the AirPiConsole.